Control a RC car with Raspberry Pi
15 Jun 2018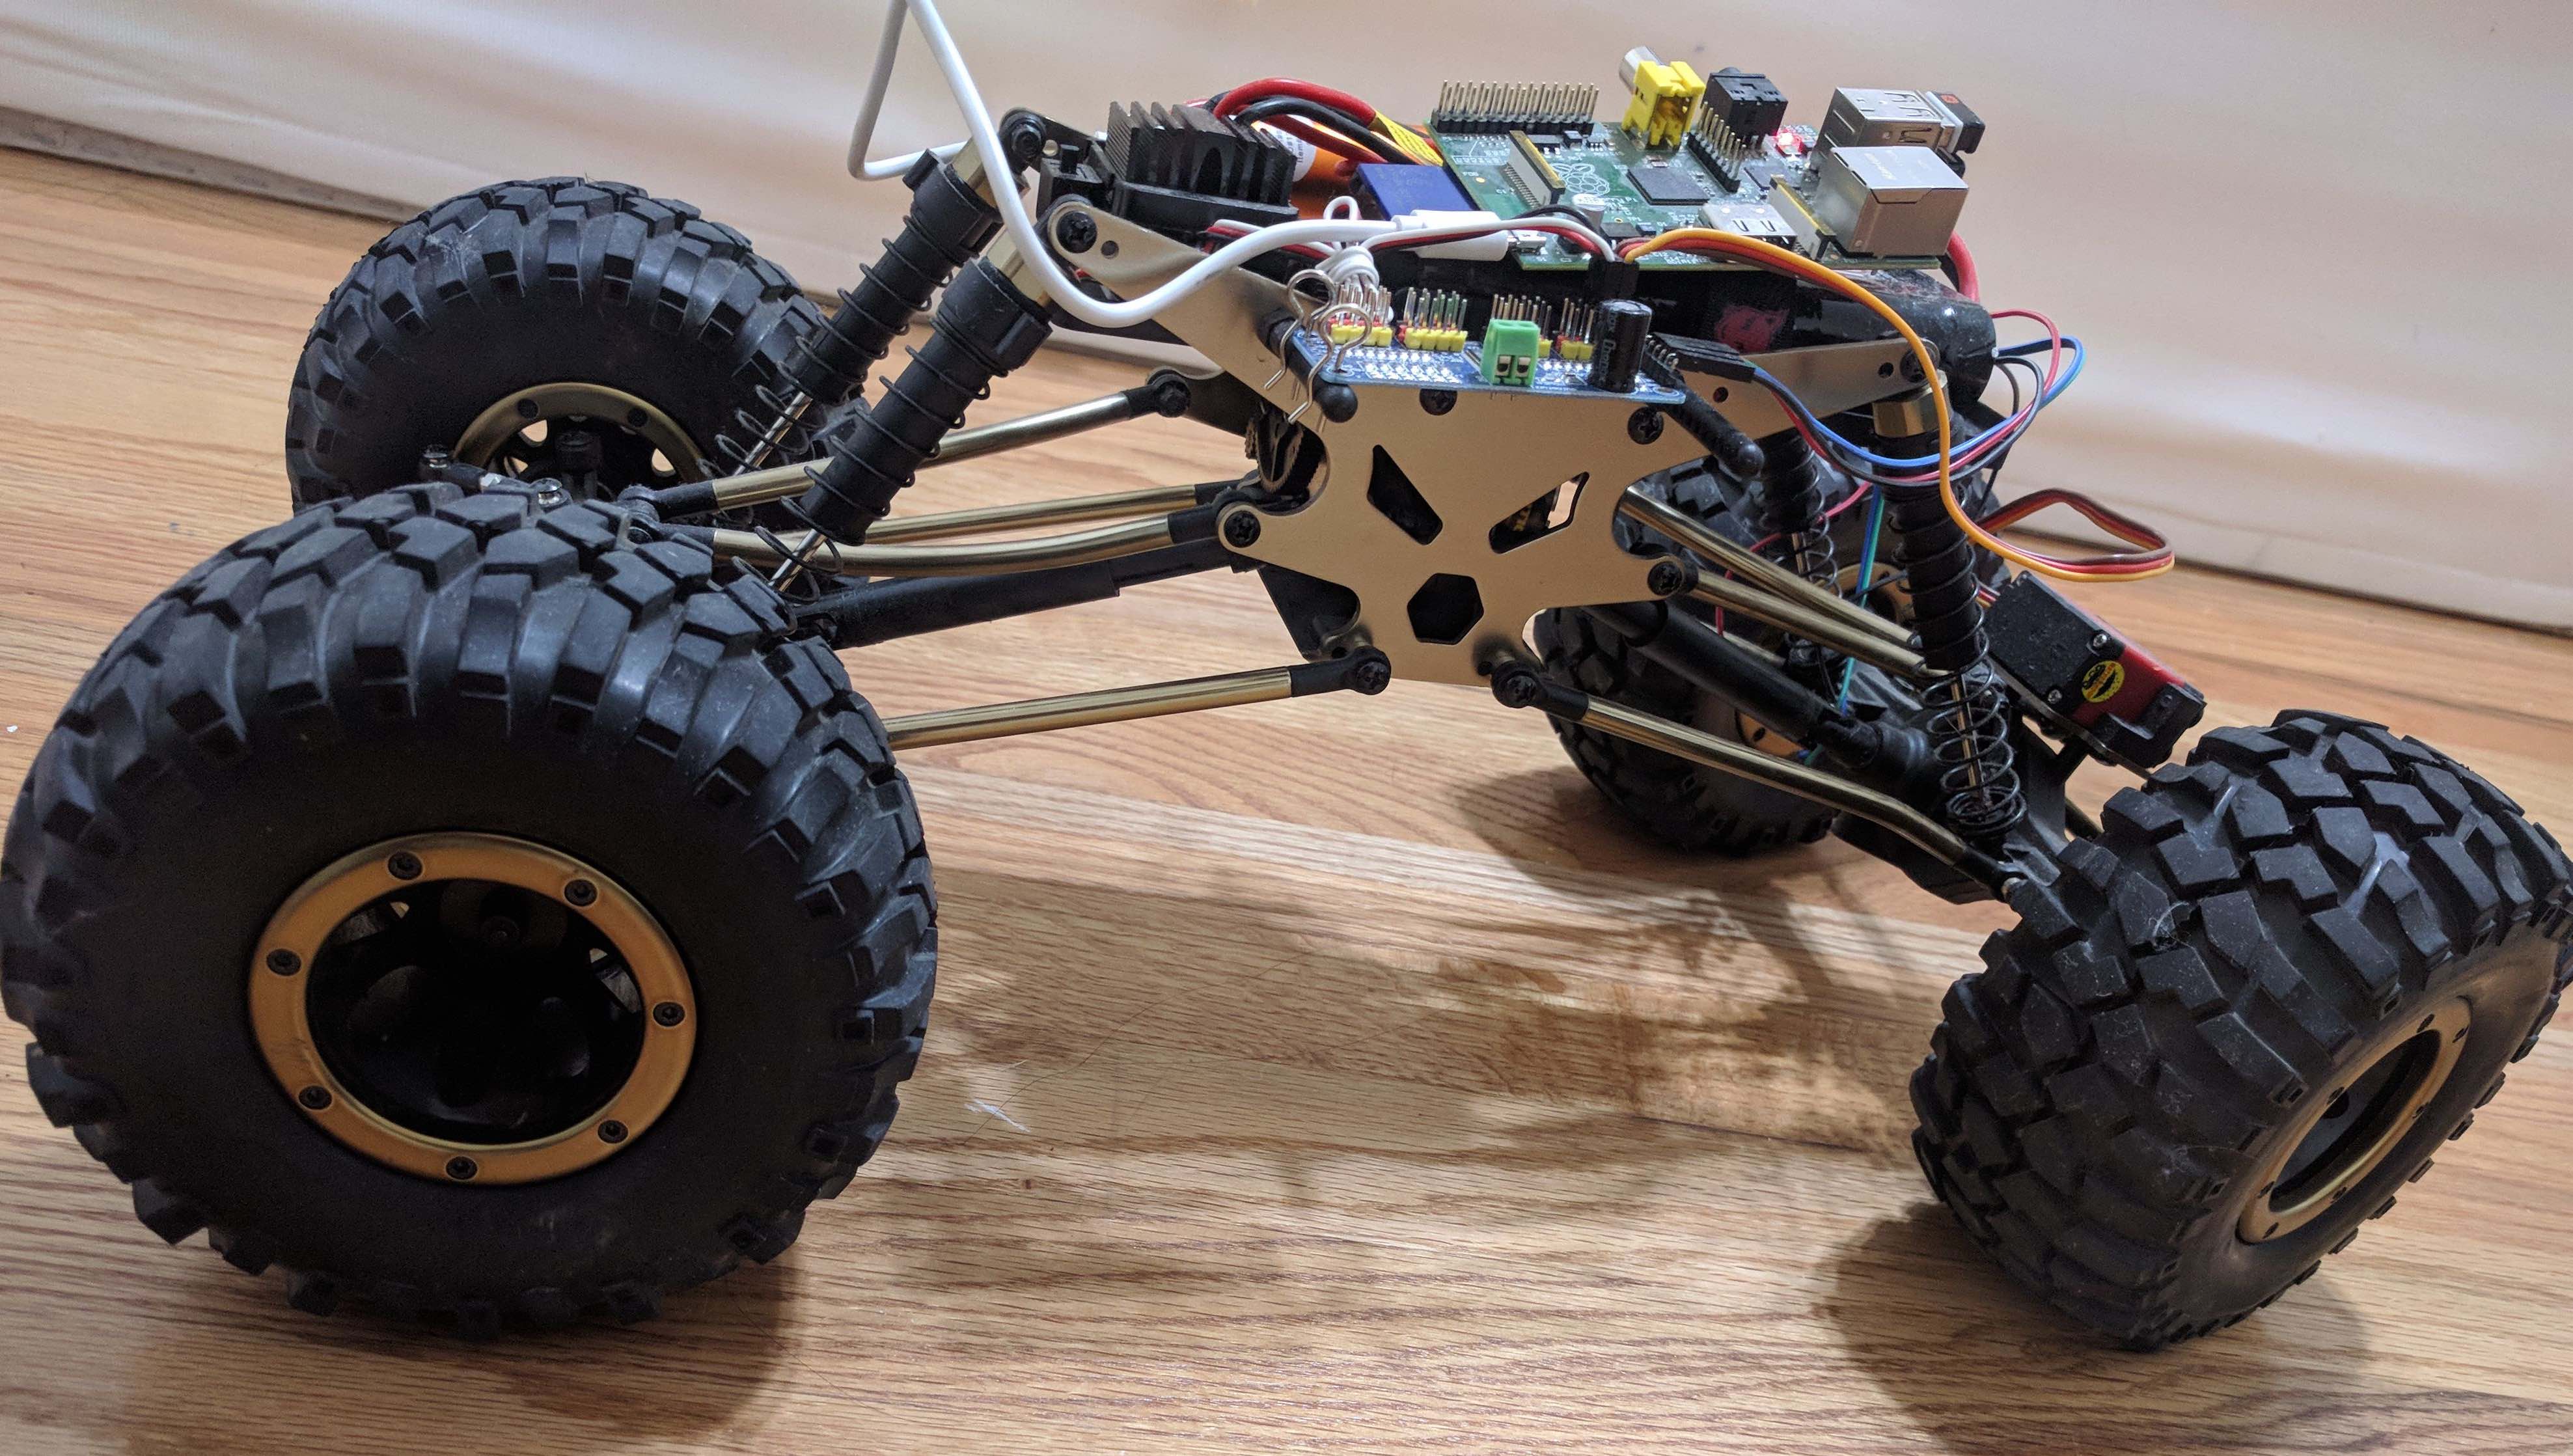
In this post, I will describe the setup to control an RC car with Raspberry Pi (RPi). The control process will be manual (no intelligence yet); basically login into RPi with SSH and use keyboard to control the movements.
In the next posts I am targeting to showcase the use of lidar and auto navigation.
Components
- A Good quality RC car (one that uses a servo motor for turning the wheels and uses ESC). I am using Red Cat’s Everest monster truck. Donkey car recommend using an exceed truck. I have not used it but it has great price and reviews. Having a smaller car helps in testing indoors.
- A Raspberry PI with WiFi . I am using an older raspberry pi 2 with a wifi dongle.
- A Servo driver (SD). From Amazon or a little bit expensive one from Adafruit. If you are okay with the wait then you can get them for less than $2 from China. It is used more for convenience and easy separation of power source between RPi and motors.
- Several jumper cables - female to female. This set has a set of assorted cables.
- A USB portable phone battery charger - to power Raspberry Pi.
Overview
Below is a high level overview of the steps.
- Remove and replace the RC receiver on the car with servo driver (SD)
- Connect raspberry pi to SD
- Software setup on Raspberry Pi
- Calibrate/play around with driver output to setup limits
Detailed steps
I will now go into the details of each of the above steps.
1. SD Connections
I am using a servo driver (SD) because it is convenient to control multiple servos while maintaining electrical separation between Raspberry Pi (RPi) and motors.
It is possible using the latest RPi to control multiple servos from GPIO pins as long as the motors
are powered through a different power supply.
If you want to pursue that route, pigpio seems to be a good library with python interface. I have not used it personally.
In my Red Cat car, the ESC/BEC connects directly to the battery and powers the RC receiver and the turn servo (via RC receiver).
When we replace the RC receiver by SD, ESC continues to power the drive motor and provides V+ to SD which continues to powers the turn motor.
The ESC control is similar to servo control, so now we can control both the motors via SD.
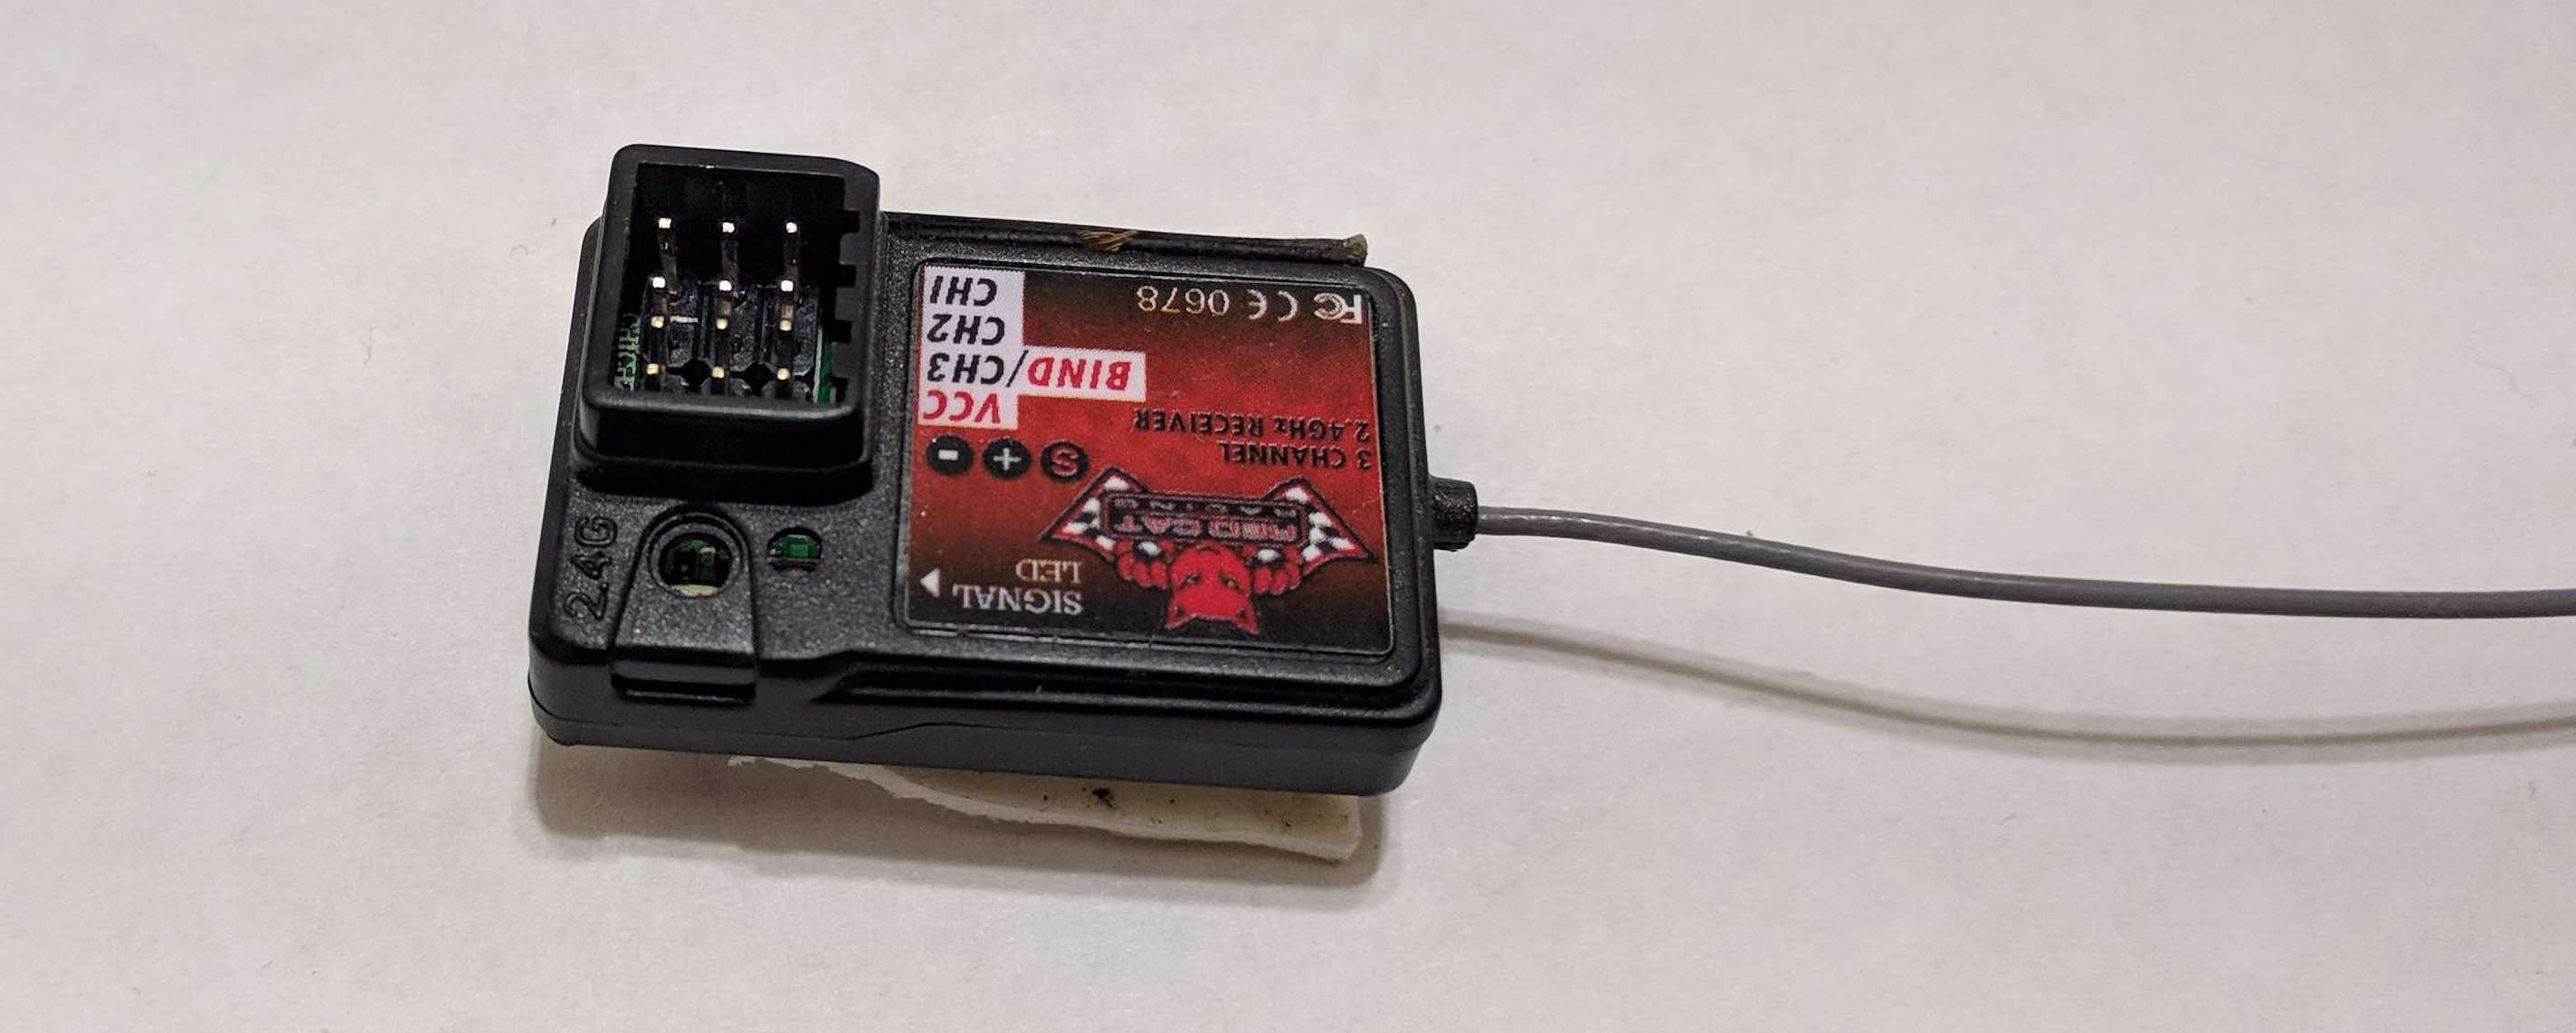
Remove RC receiver and install the servo driver (SD) in place. A RC receiver looks like the picture below. RC receiver should have an antenna sticking out.
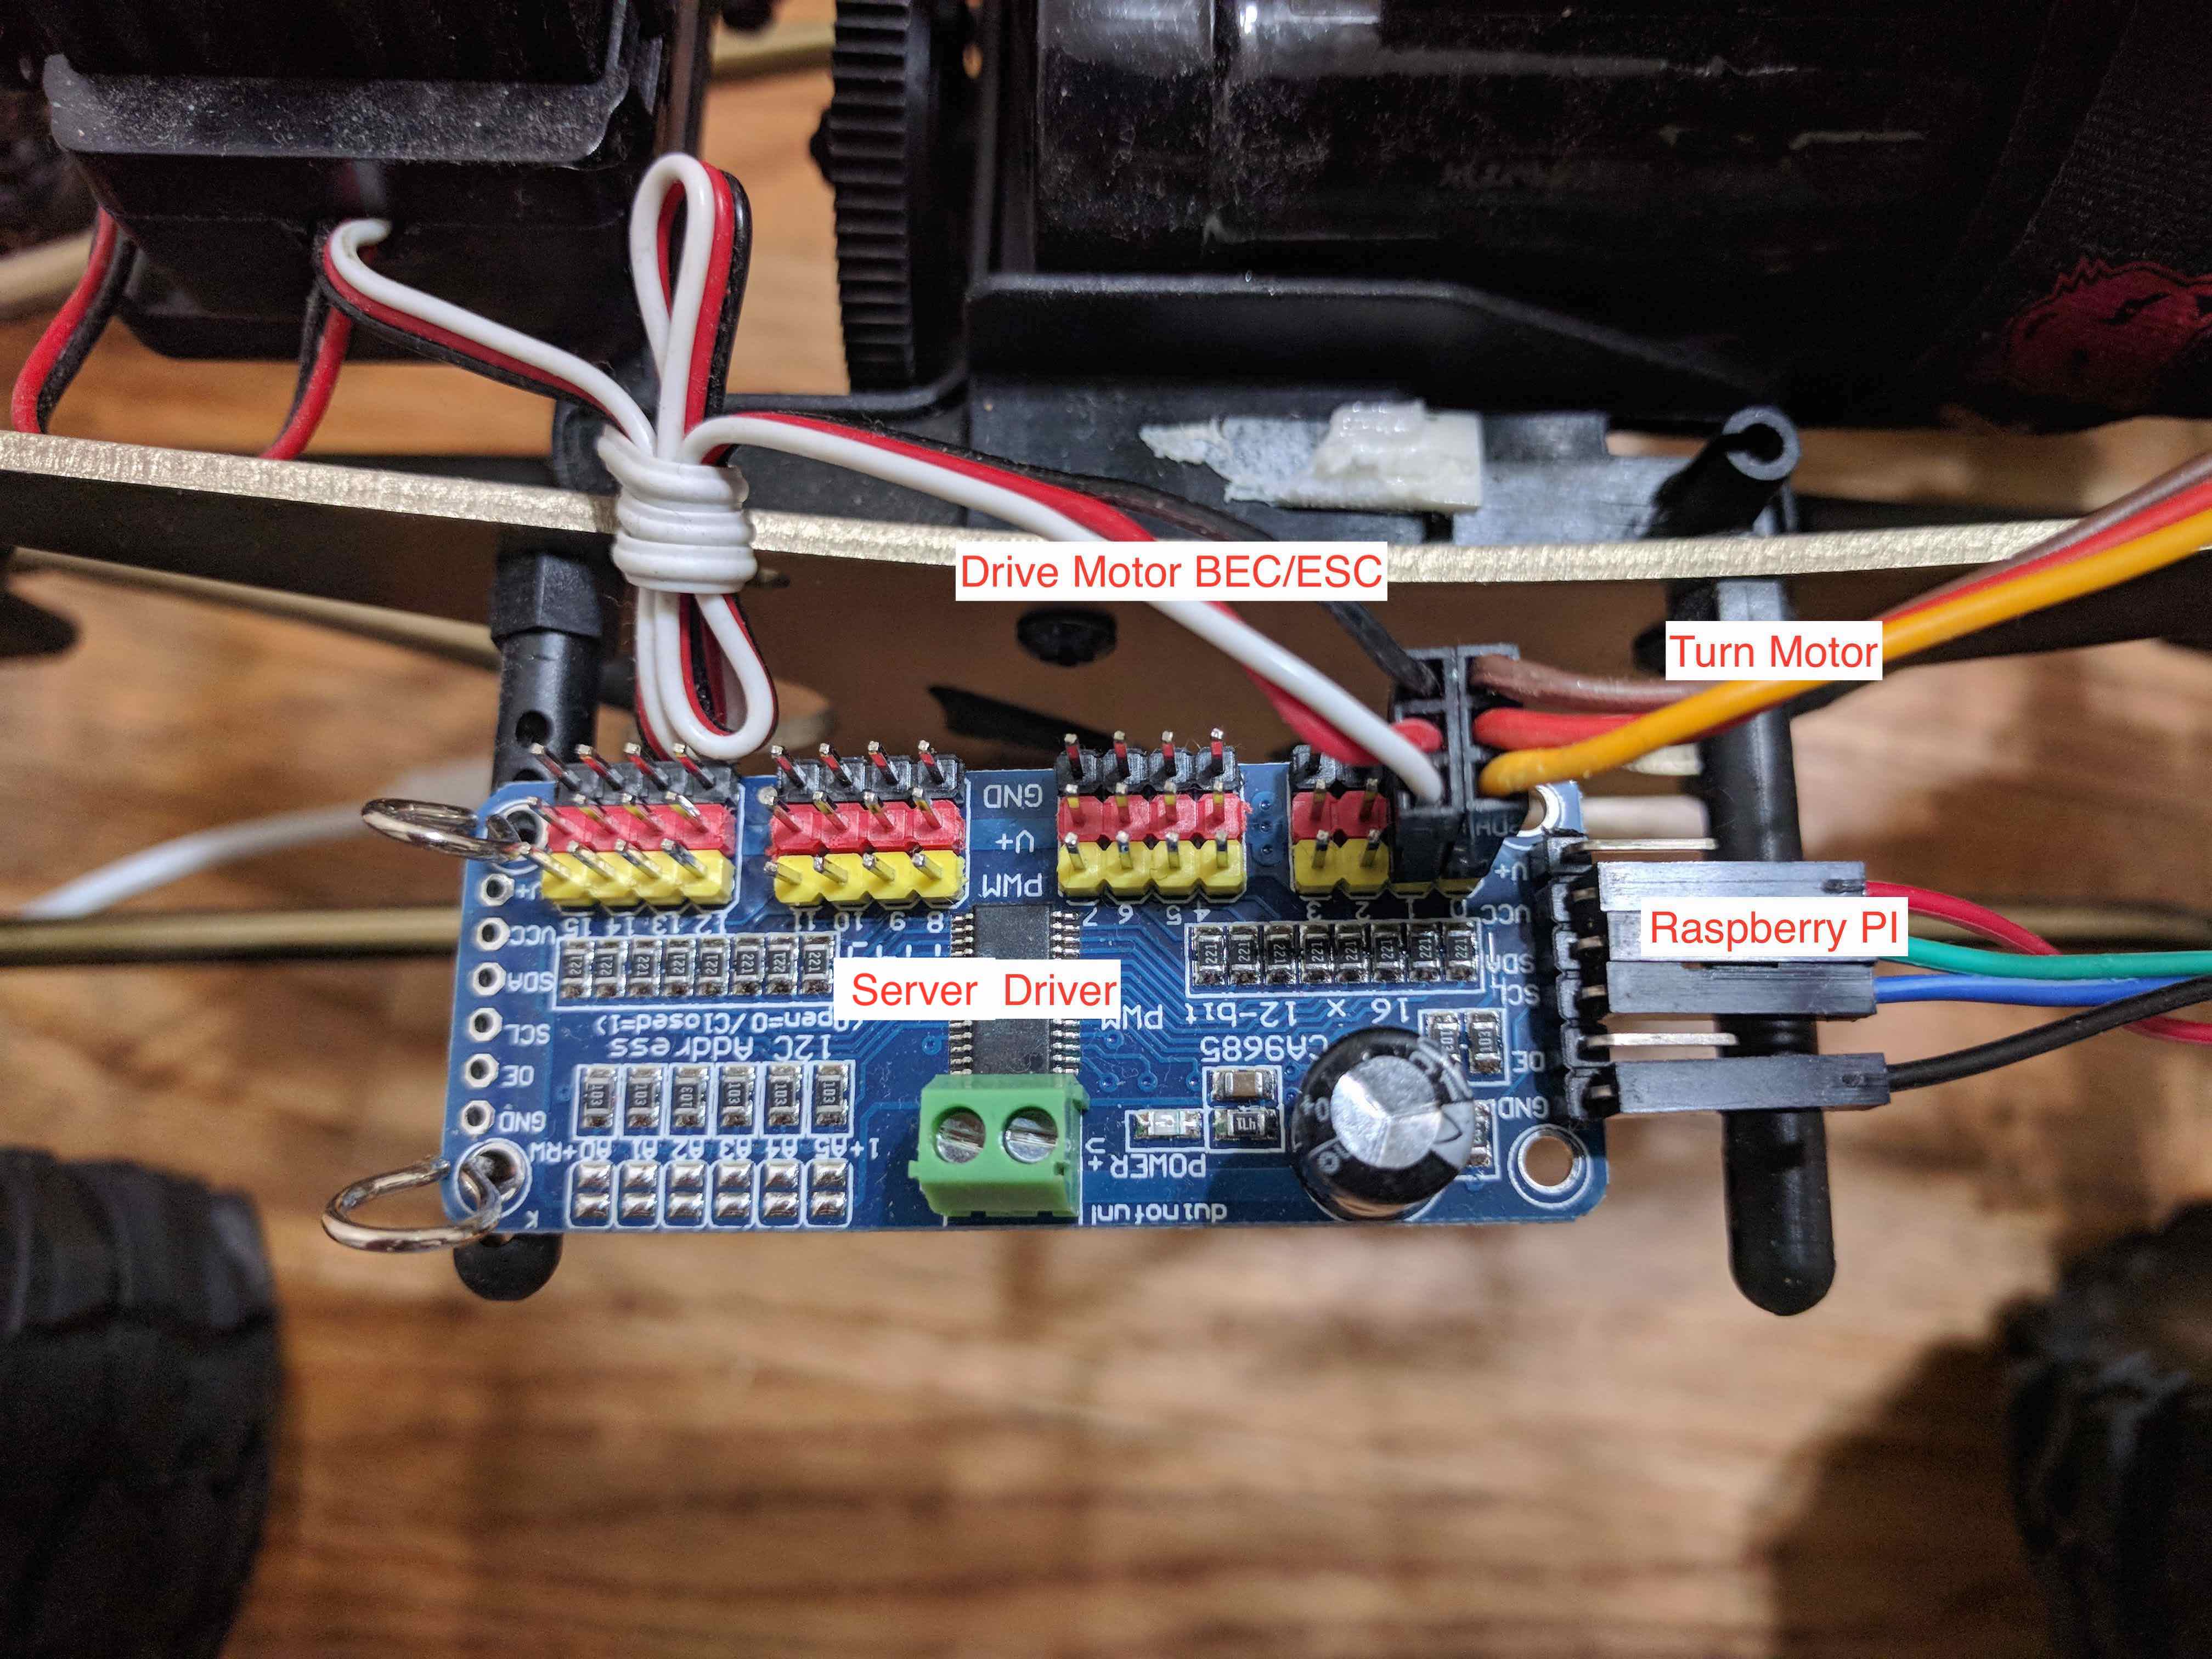
Next, connect the motor cables removed from the RC receiver to the SD, make sure that the cable connected to -ve side of the RC receiver
(ground) is connected to the black terminal on SD, rest will line up automatically.
The middle (Red) on SD should connect to the +ve terminal and the top (Yellow) terminal on SD should connect
to the wire previously connected to the Signal terminal on the radio receiver.
The numbering on the ports starts from 0. We will use these port number to later identify turn and drive motors in the python code.
Note: Before removing any connections take pictures of the existing connections from several angles so that we can go back to the out-of-box configurations if needed.
Note1: Links on Servo control 1, 2 , 3
2. RPi Connections
We need to connect four GPIO pins from RPi to the side pins on the SD (check the image below). This particular SD can be controlled over I2C protocol. Below is the list of pin connections.
| Pin on RPi | Pin on MD | Purpose |
|---|---|---|
| 1 (VCC 3.3V) | VCC | Powers SD |
| 3 (SDA) | SDA | I2C |
| 5 (SCL) | SCL | I2C |
| 6 (GND) | GND | Ground |
Here is a detailed diagram for pin layout and numbering on different versions of RPi. Above numbering might be different for your version of RPi.
Leave V+ and OE pins unconnected on SD. V+ pin is used to power the load. Since we have already connected ESC’s three pin adapter which has V+, we don’t have to use this pin.
Next, connect the usb power supply to power the RPi.
3. Software setup on Raspberry Pi
(If you are new to RPi, I recommend following this guide to get started with RPi)
When running for the first time, we need to enable I2C module on RPi. The detailed instructions are here. Briefly said, run sudo raspi-config from terminal and from the Advanced Options enable I2C; Reboot.
Now install AdaFruit’s PCA9685 (SD) library:
sudo apt-get install git build-essential python-dev
cd ~
git clone https://github.com/adafruit/Adafruit_Python_PCA9685.git
cd Adafruit_Python_PCA9685
sudo python setup.py install
This library provides an easy interface to the SD driver. In the next section, we are going to use two python scripts to test, calibrate, and control the RC car. Download the script from here
(Note: For controlling the RC car remotely, You should be able to connect your RPi to a WiFi network and login over ssh)
4. Test before run
First, we will run the simpletest.py to make sure connections are correct. This script is based on the example provided in Adafruit’s library. Main modification is the PWM frequency for ESC which I have set to 50.
This code continuously moves the motor from one extreme to another extreme.
The extremes are defined here.
I have iteratively calibrated the extremes (pulse length) to match the extremes supported by the motor. You will have to calibrate for your own car.
Run this code for all the motors in your RC to make sure that SD is connected properly and ESC is controllable. SD channel/motor to control can be selected
here.
Run using
python testsimple.py
 |
 |
| testing turns | testing drive |
Note: when running the above code make sure the car is secure and wheels do not touch anything.
5. Run
With the connections tested, we are now in position to control the car from RPi. Again for the first test, please make sure that car is secure and wheel cannot touch anything. We will now run the controltest.py script. Set your channels here. The extreme pulse length values discovered when running the simpletest.py can be now set here
Run using
python controltest.py
Use arrow keys to move the turn and driver motors. You might have to hold the keys a little bit longer to increase the speed or the angle of the turn faster. Press q to exit.